Imaginando
Midi Controller Module - LK Help
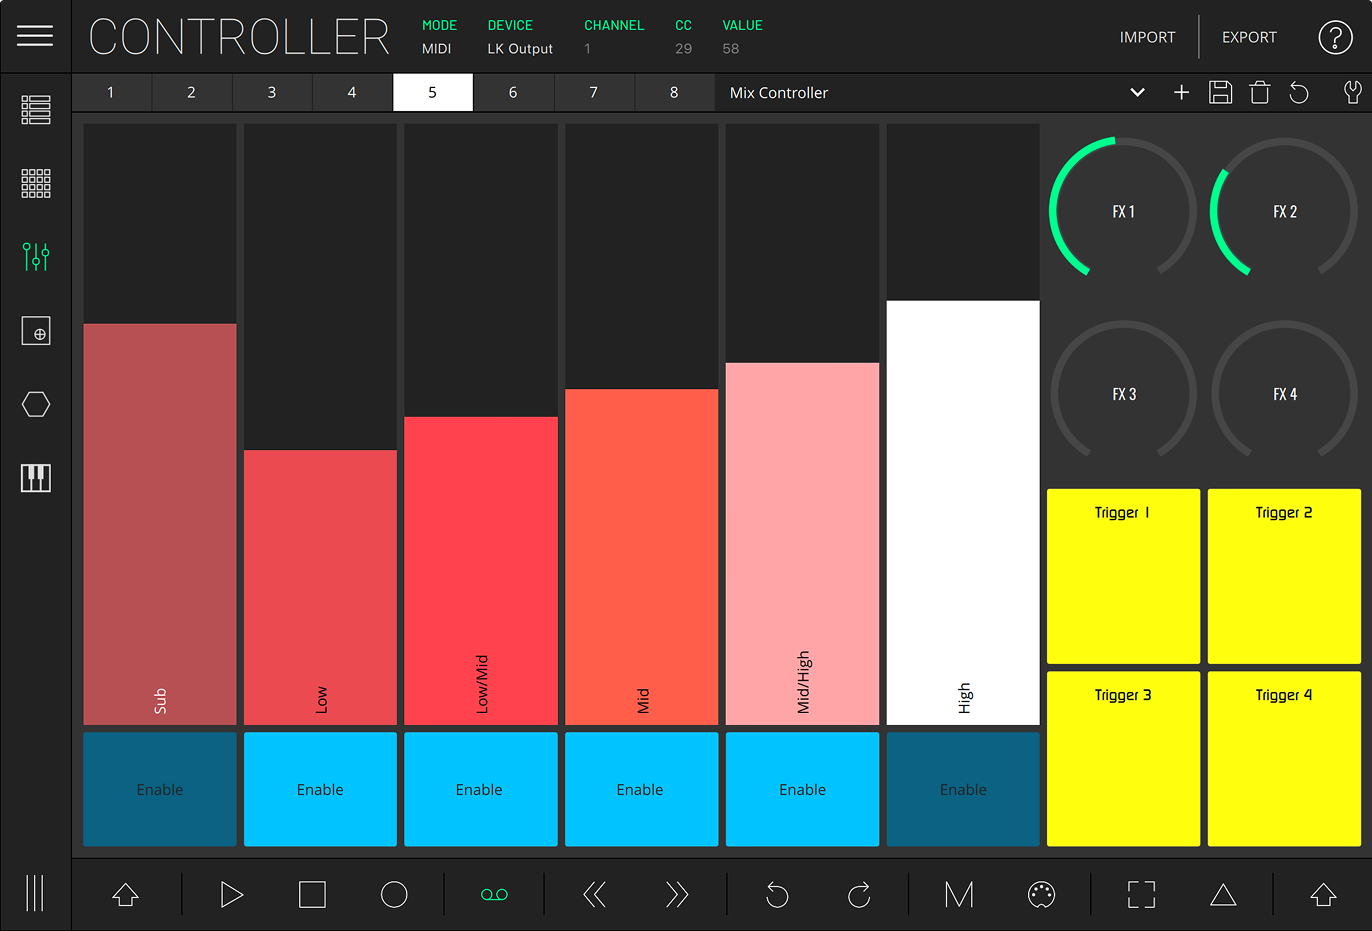
This module allows building custom MIDI controllers with knobs, faders, switches and pads. Each control element can be customized to have its own size, color, name and MIDI information.
The layout list stores custom layouts, and each of the eight available banks can be assigned a layout for quickly recalling your layouts.
In MIDI mode, the Controller will output MIDI to the selected DEVICE. This mode may be used to control external hardware and apps. In LIVE mode, the controls can be assigned to Ableton Live parameters in your session.
Depending on the selected mode, you will find different options in the status bar at the top of the screen:
- MODE - Toggle between MIDI and LIVE modes.
- DEVICE (MIDI MODE) - Select output MIDI device.
- CHANNEL (MIDI MODE) - Select output MIDI channel.
- CC (MIDI MODE) - Shows the CC number assigned to the last touched control.
- PARAMETER (LIVE MODE) - Shows the Ableton Live parameter assigned to the last touched control.
- VALUE - Shows the value sent by the last touched control.
- BANK - Switch between the four different banks of controls.
- IMPORT - Import the layout list from a JSON file. New layouts are added to your current list.
- EXPORT - Export the layout list as a JSON file.
- HELP - Opens help tooltips.
The first bank comes loaded with the Default layout, containing eight rows. Each row has a button, knob, slider and pad. All the other banks are loaded with the Empty layout, a blank slate to start building your own controller.
Under status bar is the Controller’s toolbar, with the following functions:
- BANK SELECTION - Select between the eight available banks. When you change a layout from the list you’ll be mapping it to the current select bank.
- LAYOUT LIST - A list containing the Default and Empty layouts, as well as your created custom layouts.
- ADD NEW - Saves the currently visible layout as a new layout.
- SAVE - Overwrites the layout with the current changes. Note that the layout changes in every bank they’re assigned to.
- DELETE - Deletes the layout that is currently selected in the layout list. Note that the layout is removed from any banks they’re assigned to.
- REVERT - Reverts current layout changes.
- EDIT MODE - Toggles the Edit mode.
Edit mode
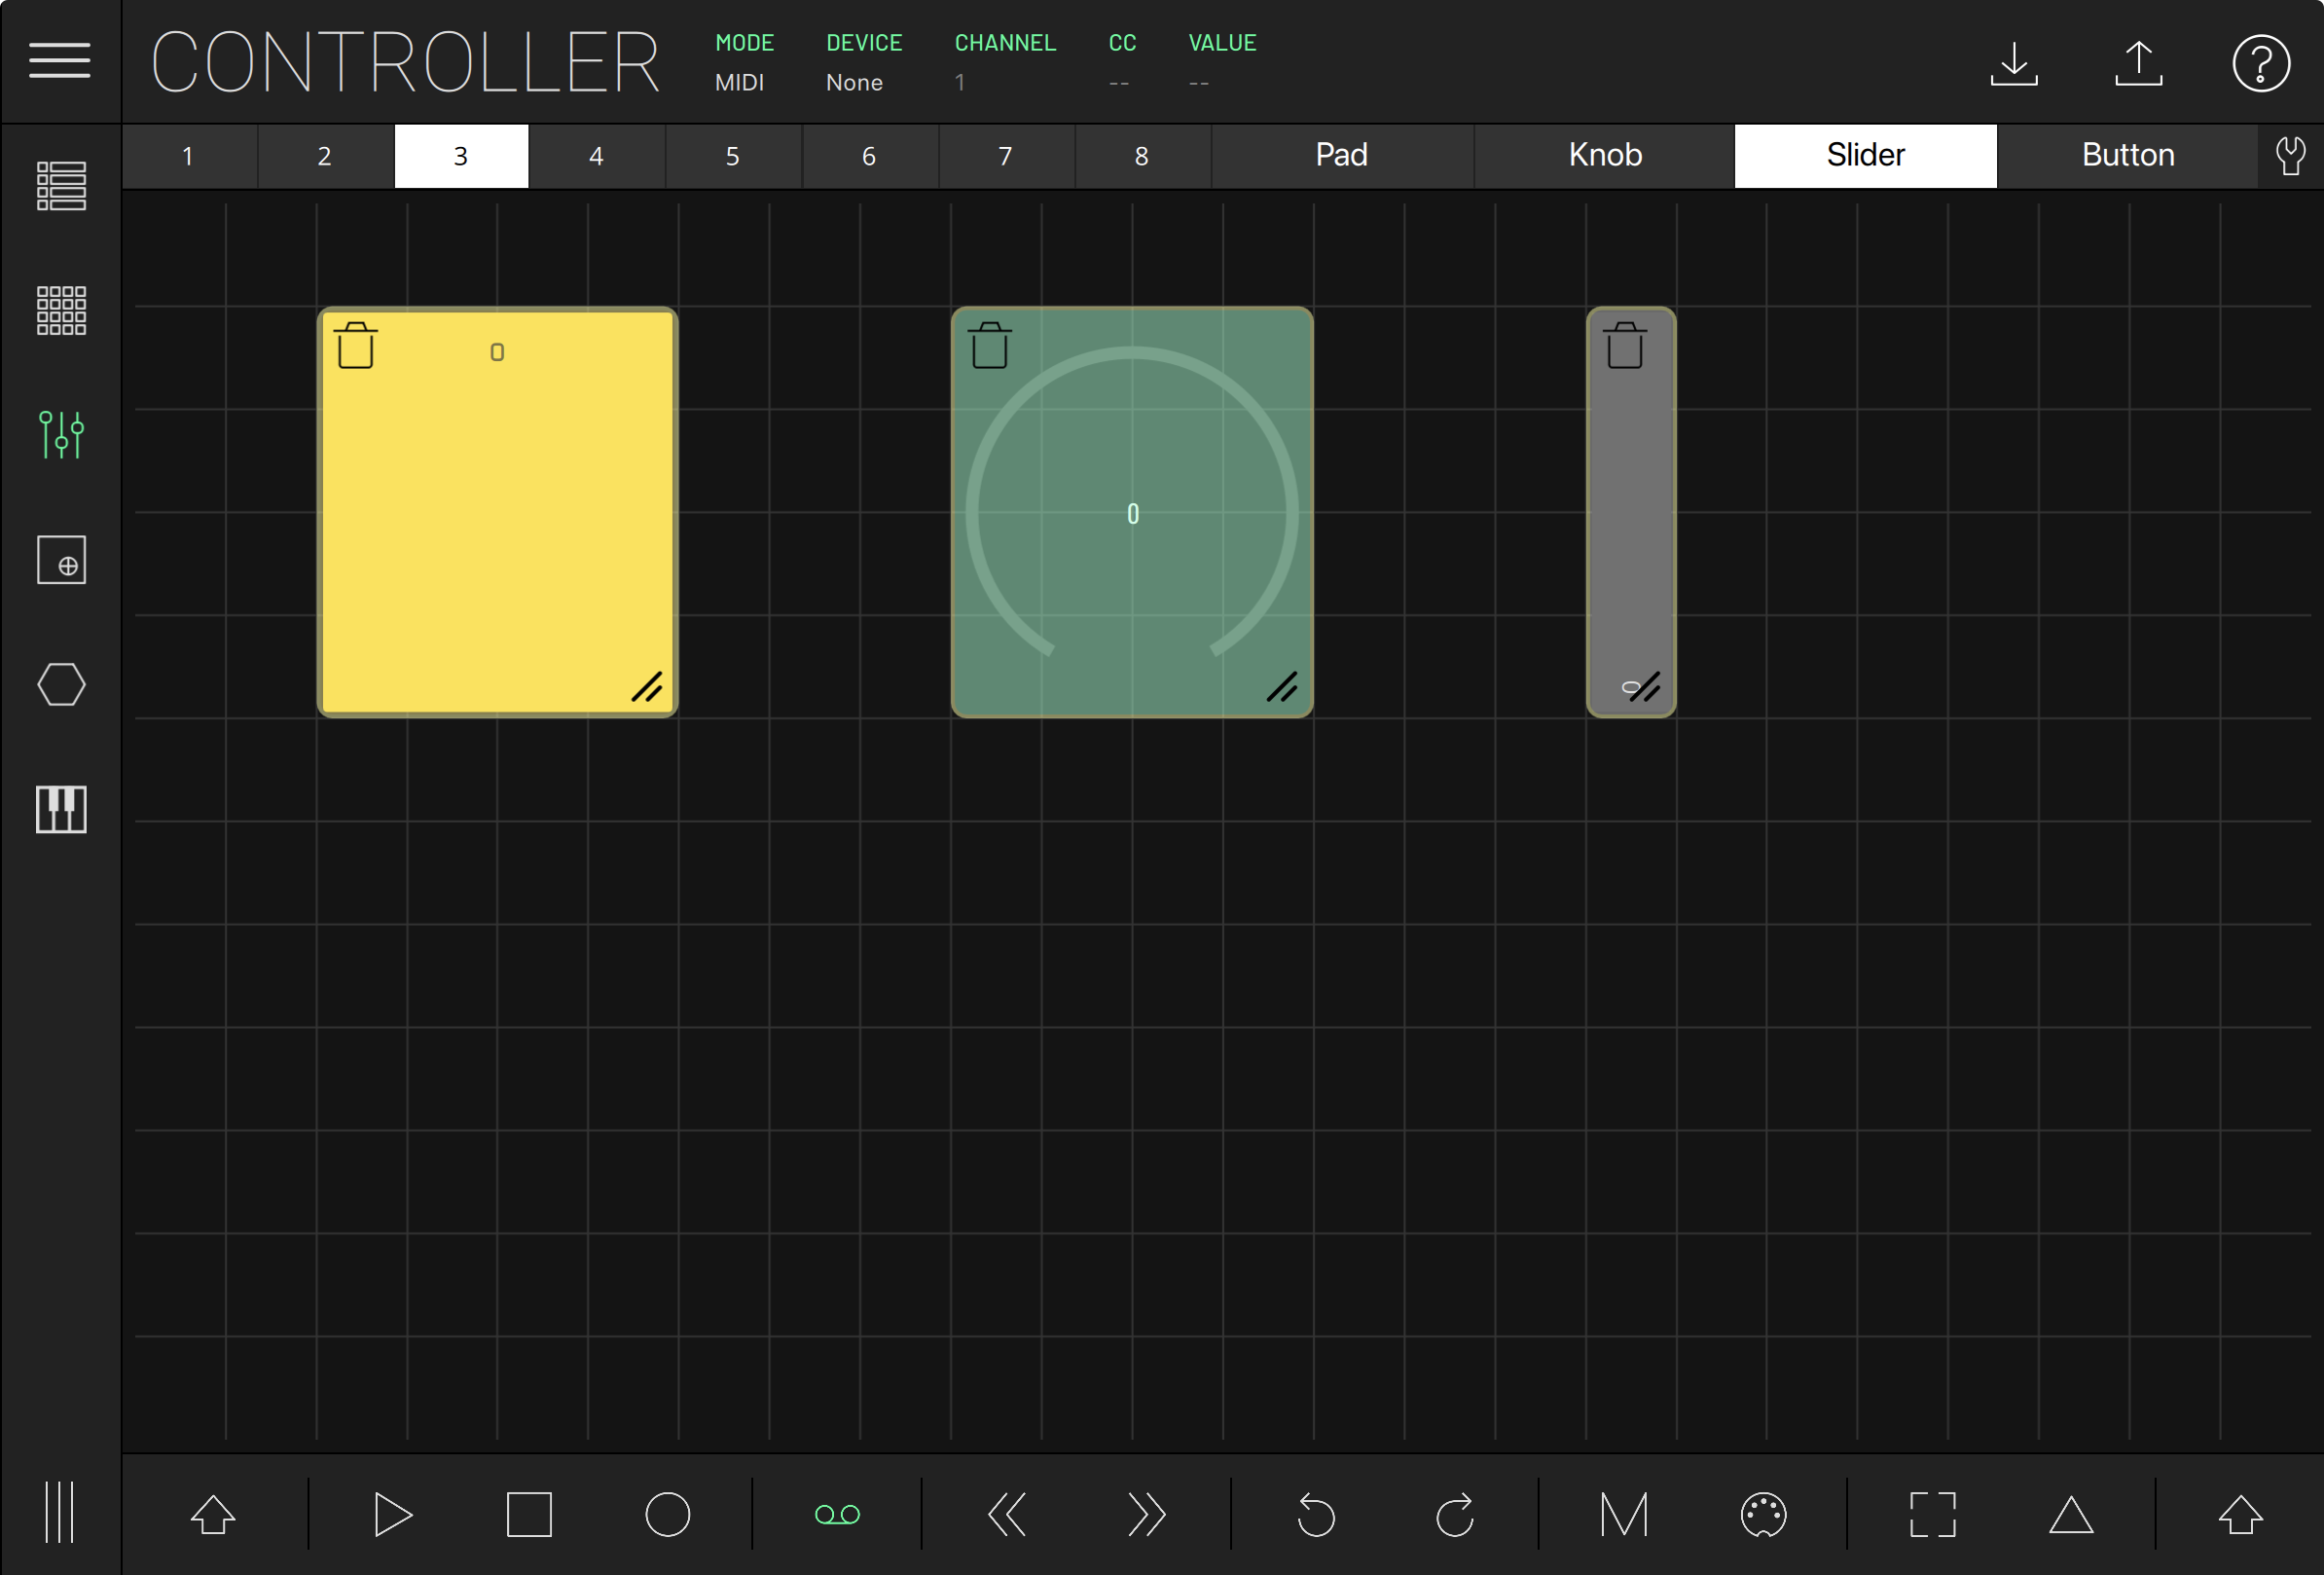
Edit mode lets you customize the current layout. In this mode, the toolbar changes to a control selection with four options: pad, knob, slider and button. Select the control element you wish to create, and press a free position in the grid to create it. Drag it while pressing to change its size.
You can move the control by pressing and dragging it around, delete it by pressing the bin icon, and change its size by pressing and dragging its bottom right corner. Double press the control to open the MIDI Assign panel in MIDI MODE or the Live Assign in LIVE MODE.
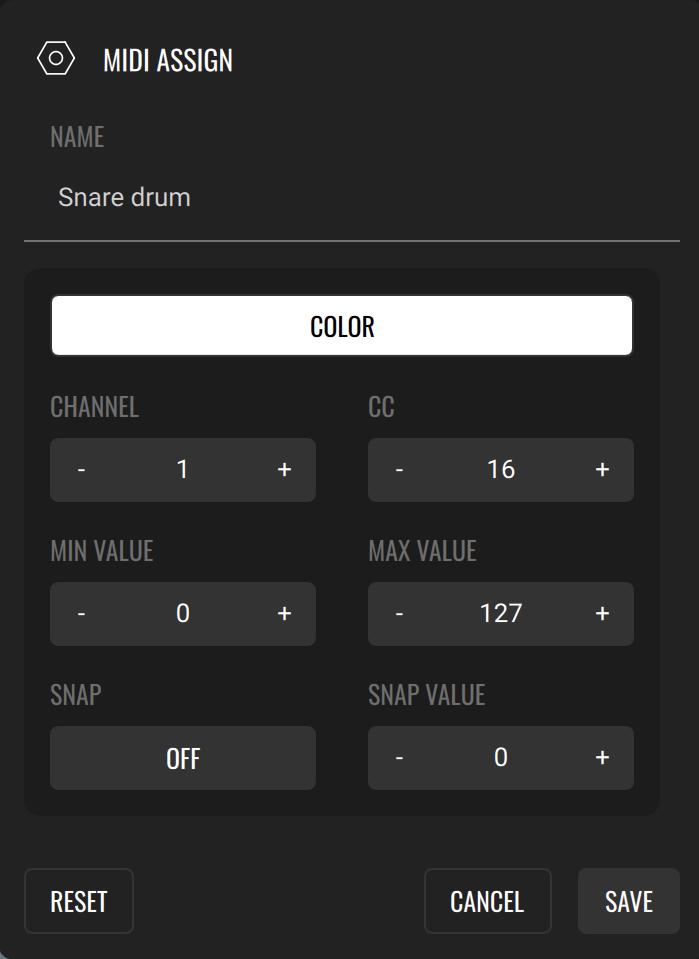
Assigning a custom MIDI CC
To customize the MIDI mapping (MIDI mode), tap ASSIGN, then tap the control you wish to change. This will open a pop-up for editing the name, color, MIDI channel, CC number, min and max values, and snap options. RESET resets the mapping to its default state.
SNAP enables snapping knobs and faders to a designated SNAP VALUE once the control is released.
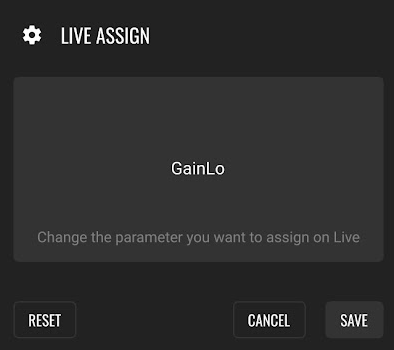
Assigning an Ableton Live Parameter
To control parameters in Live mode, press ASSIGN and select the LK control you want to map. Change the parameter you want to assign in Ableton Live; the name of the parameter will be displayed on the screen. Press SAVE to confirm.